Windows Host
This section describes how to install images to on-board eMMC from USB OTG port with a Windows PC.
- Step 1: Make sure the driver is installed on Windows
- Step 2: Prepare necessary images
- Step 3: Boot device into maskrom mode
- Step 4: Flash images onto eMMC and reboot
Step 1: Make sure the driver is installed on Windows
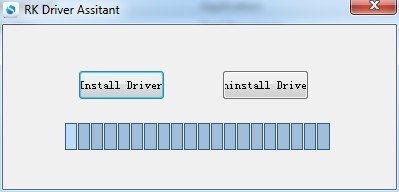
Install driver with RK Driver Assistant tools
Dowload the Rockchip Driver Assistant and install the driver. Note: you don't need to connect the device at the monment. If you've previously tried to install the Rockchip USB drivers for any other Rockchip devices make sure you click “Uninstall Driver” first.
Install Rockchip Android Tool
Rockchip Android Tool is the all in one ultility to flash/program Rockchip devices. Download and extract it anywhere in the PC.
Step 2: Prepare necessary images
Go to the Downloads page to donwload the image or use the one you build. xxx-rkupdate.img is the default name suffix if you follow the build instructions of AOSP. You also need the loader.bin as the download helper if the image format is GPT. Rkupdate format image already packed the loader.bin inside.
Step 3: Boot device into maskrom mode
Maskrom mode is the code inside the Rockchip SoC running and waiting for commands from USB when there is no external bootable media. To put the device into maskrom mode:
You need USB3.0 or USB2.0 type A to type A male cable:
- remove SD Card
- power off the Ficus2-RK3399Pro board
- plug the Ficus2-RK3399Pro to Windows PC with USB type A to type A male cable from the USB 3.0 OTG port, as below:
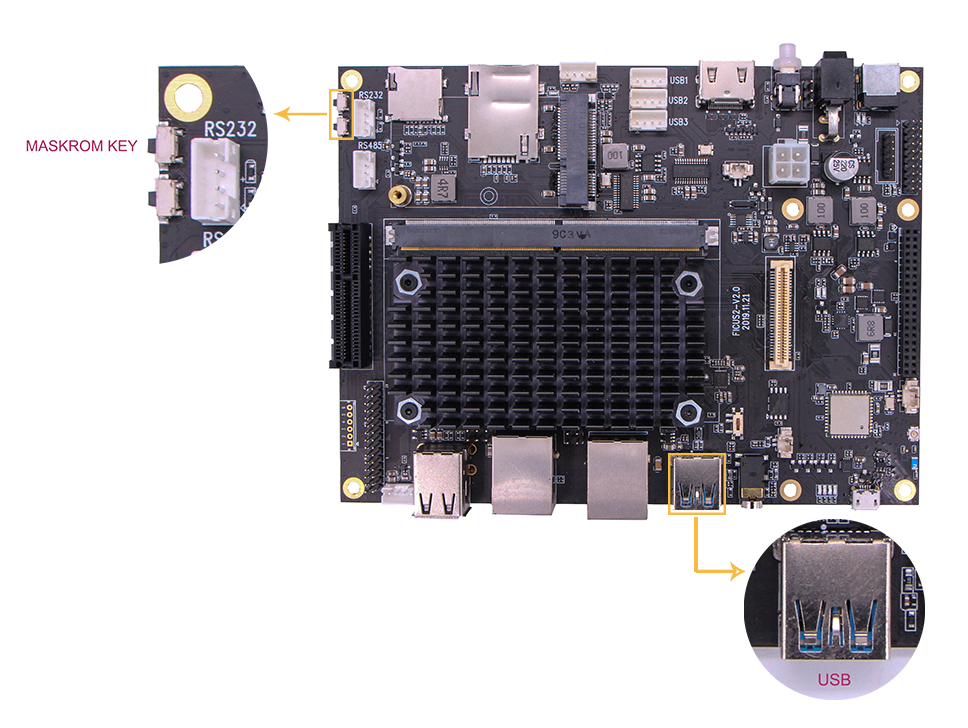
- press and hold the maskrom key, then power on the device
- release maskrom key(important!)
On Windows Device Manager, you will see below device if the driver is install properly in step one:

Note: You don't need to switch the HOST/DEVICE switch for USB OTG, in maskrom mode, USB OTG is forced as device mode.
Alternatively, if you are running Android and can access ADB under Windows, you can switch the device from ADB mode to MASKROM mode with the Rockchip Android Tool.
After the device is in maskrom mode, on the Windows PC, usb view should show the following VID/PID if the board is in maskrom mode: Bus 003 Device 061: ID 2207:330C
Note: if no right USB device found, try:
- Press and hold maskrom key longer, and release it
- Check your usb cable, plug and unplug the usb cable, reverse plug the type C cable and try
- Try the direct USB port at the back of mother board
- Try with USB 2.0 cable, not 3.0
Step 4: Flash images onto eMMC and reboot
RKDevTool supports rkupdate and raw GPT image formats, the installation process is a little different.
rkupdate image format
For rkupdate image format, click the Upgrade Firmware Tab, and select firmware image with the Firmware button, shown as below:
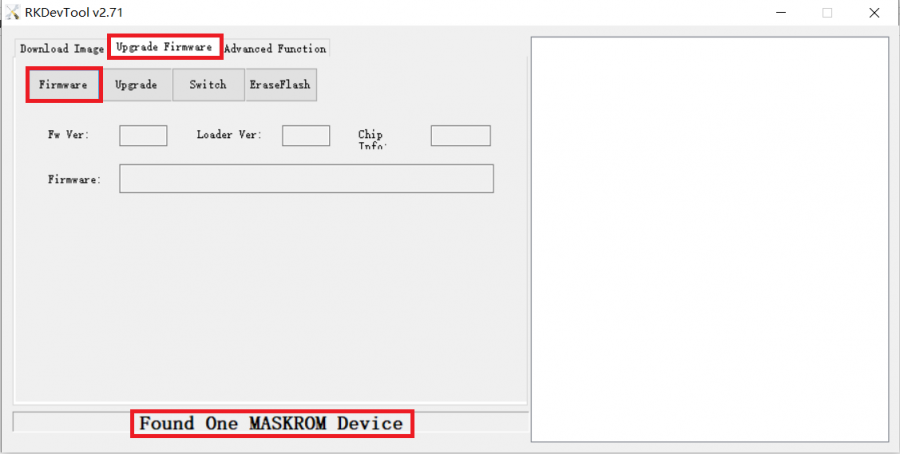
Click the Upgrade button the perform the installation. If you want to earse the data on eMMC first, you can click the EraseFlash button first before clicking Upgrade button. The installation progress will be shown at right side, as below:

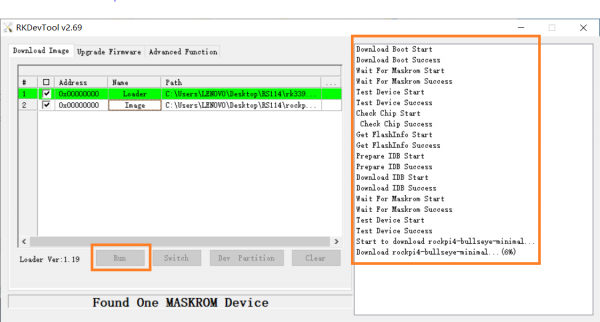
gpt image format
For GPT image format, click the Download Image Tab. Make sure the first row Name is Loader and Second row Name is Image, both Address is zero:
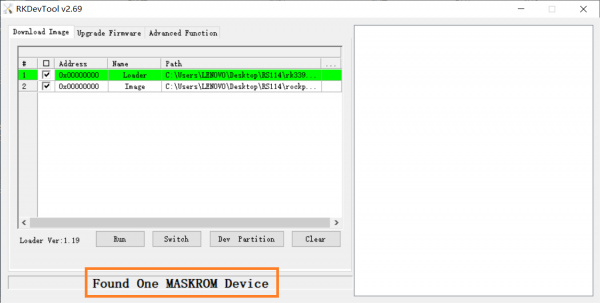
Then click the right last columns to in the Image row and choose the loader.bin and the image you want to flash:
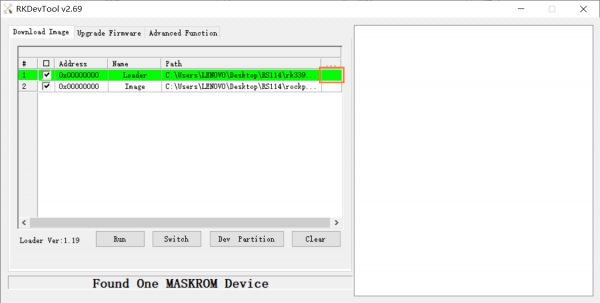
Finally, click the "run" button in the red box below, and you will see the content in the red box on the right. When the progress reaches 100%, the download is completed: